Next.js 시작해보자 4/5 - Dynamic Routes
https://nextjs.org/learn/basics/dynamic-routes
블로그 데이터로 index page를 채웠지만 아직 개별 블로그 pages를 만들지 않았다. 이러한 페이지의 URL이 블로그 데이터에 의존하기를 원하므로 dynamic routes를 사용해야 한다.
포스트에서 다룰 내용
- dynamic routes와
getStaticPaths를 사용해서 정적으로 페이지 만들기 - 각 블로그 포스트에 데이터를
getStaticProps를 어떻게 작성해서 가져오는지 remark를 사용해서 markdown을 renderingdynamic routes를 사용해서 page를 어떻게 연결하는지dynamic routes에서 유용한 정보들
Page Path Depends on External Data
https://nextjs.org/learn/basics/dynamic-routes/page-path-external-data
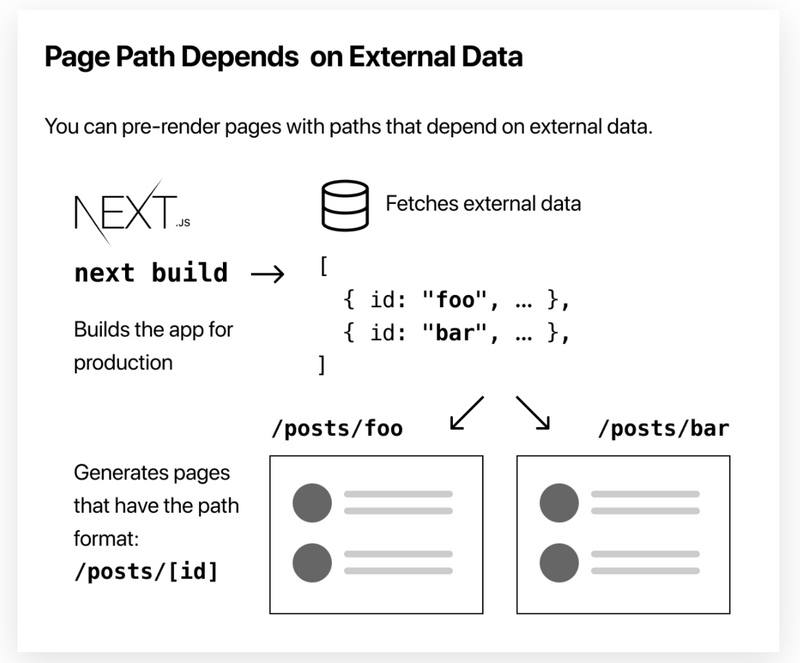
external data에 의존한 page content를 만들었다. getStaticProps을 사용해 필요한 데이터를 가져오고 index page에 render 했다. 이번에는 external data에 의존한 page path에 대해서 얘기를 해본다. Next.js에서는 external data에 의존한 path를 가지고 정적 페이지를 생성하는데 이 것을 dynamic URLs이라고 말한다.

How to Statically Generate Pages with Dynamic Routes
blog posts를 위해서 dynamic routes를 생성해보자.
- 각 포스트는
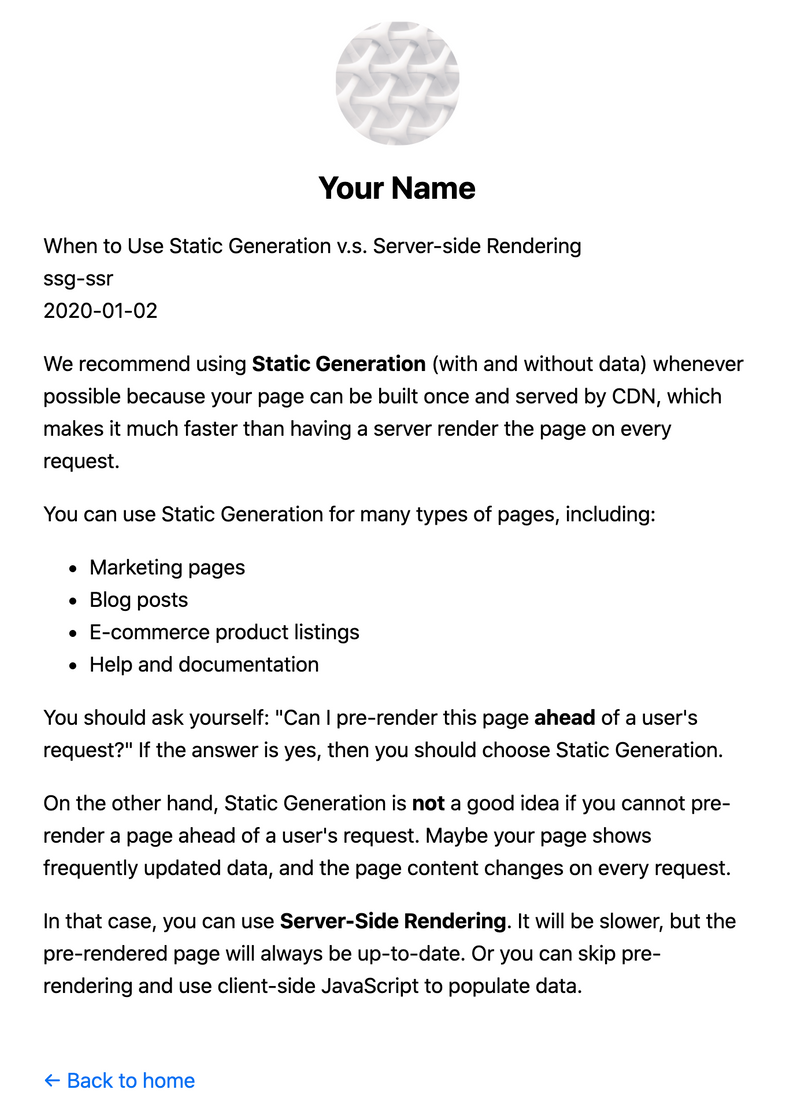
/posts/<id> ssg-ssr.md는/posts/ssg-ssr로
<id>를 dynamic 하게 생성이 가능하다.
Implement getStaticPaths
https://nextjs.org/learn/basics/dynamic-routes/page-path-external-data
아래와 같이 파일을 구성
[id].js를pages/posts안에 생성
이전에 생성했던 lib/posts.js에 아래와 같이 함수를 추가한다. .md를 제거하고 파일명을 받아서 id로 사용하기 위해서
export function getAllPostIds() {
  const fileNames = fs.readdirSync(postsDirectory)

  // Returns an array that looks like this:
  // [
  //   {
  //     params: {
  //       id: 'ssg-ssr'
  //     }
  //   },
  //   {
  //     params: {
  //       id: 'pre-rendering'
  //     }
  //   }
  // ]
  return fileNames.map((fileName) => {
    return {
      params: {
        id: fileName.replace(/\.md$/, ""),
      },
    }
  })
}pages/posts/[id].js에 아래와 같이 추가
import { getAllPostIds } from "../../lib/posts"그리고 getStaticPaths를 생성하고 호출
export async function getStaticPaths() {
  const paths = getAllPostIds()
  return {
    paths,
    fallback: false,
  }
}
Implement getStatic Props
https://nextjs.org/learn/basics/dynamic-routes/implement-getstaticprops
id가 주어졌을때 post를 렌더링하기 위해서는 데이터 fetch를 하는게 필요하다. 그 작업을 위해서 lib/posts.js에 id를 기반으로 post를 리턴하는 함수를 구성하자
export function getPostData(id) {
  const fullPath = path.join(postsDirectory, `${id}.md`)
  const fileContents = fs.readFileSync(fullPath, "utf8")

  // Use gray-matter to parse the post metadata section
  const matterResult = matter(fileContents)

  // Combine the data with the id
  return {
    id,
    ...matterResult.data,
  }
}pages/posts/[id].js에 아래와 같이 코드를 추가하고
import { getAllPostIds, getPostData } from "../../lib/posts"getStaticProps의 코드를 추가
export async function getStaticProps({ params }) {
  const postData = getPostData(params.id)
  return {
    props: {
      postData,
    },
  }
}
Post 컴포넌트를 postData를 사용하도록 변경
export default function Post({ postData }) {
  return (
    <Layout>
      {postData.title}
      <br />
      {postData.id}
      <br />
      {postData.date}
    </Layout>
  )
}Render Markdown
https://nextjs.org/learn/basics/dynamic-routes/render-markdown
markdown content를 rendering 하기 위해서 remark 라이브러리를 사용
npm install remark remark-htmllib/posts.js에 import
import remark from "remark"
import html from "remark-html"getPostData()에 remark를 추가
export async function getPostData(id) {
  const fullPath = path.join(postsDirectory, `${id}.md`)
  const fileContents = fs.readFileSync(fullPath, "utf8")

  // Use gray-matter to parse the post metadata section
  const matterResult = matter(fileContents)

  // Use remark to convert markdown into HTML string
  const processedContent = await remark()
    .use(html)
    .process(matterResult.content)
  const contentHtml = processedContent.toString()

  // Combine the data with the id and contentHtml
  return {
    id,
    contentHtml,
    ...matterResult.data,
  }
}
await가 필요하기 때문에getPostData에async를 추가 async에 대해서 알아보기
pages/posts/[id].js의 getSTaticProps에서도 getPostData를 할때 await를 사용해야 한다.
export async function getStaticProps({ params }) {
  // Add the "await" keyword like this:
  const postData = await getPostData(params.id)
  // ...
}
마지막으로 Post 컴포넌트를 dangerouslySetInnerHTML을 사용해서contentHtml을 렌더링하도록 수정
export default function Post({ postData }) {
  return (
    <Layout>
      {postData.title}
      <br />
      {postData.id}
      <br />
      {postData.date}
      <br />
      <div dangerouslySetInnerHTML={{ __html: postData.contentHtml }} />
    </Layout>
  )
}
Polishing the Post Page
https://nextjs.org/learn/basics/dynamic-routes/polishing-post-page
Adding title to the Post Page
pages/posts/[id].js에 post data를 사용해서 title tag를 추가 next/head를 import하고 title을 추가해보자
import Head from "next/head"

export default function Post({ postData }) {
  return (
    <Layout>
      <Head>
        <title>{postData.title}</title>
      </Head>
      ...
    </Layout>
  )
}
Formatting the Date
date를 format하기 위해서 date-fns의 라이브러리를 사용
npm install date-fnsDate 컴포넌트를 components/date.js에 생성
import { parseISO, format } from "date-fns"

export default function Date({ dateString }) {
  const date = parseISO(dateString)
  /* January 2, 2020 */
  return <time dateTime={dateString}>{format(date, "LLLL d, yyyy")}</time>
}pages/posts/[id].js에서 사용하면 된다.
// Add this line to imports
import Date from "../../components/date"

export default function Post({ postData }) {
  return (
    <Layout>
      ...
      {/* Replace {postData.date} with this */}
      <Date dateString={postData.date} />
      ...
    </Layout>
  )
}
Adding CSS
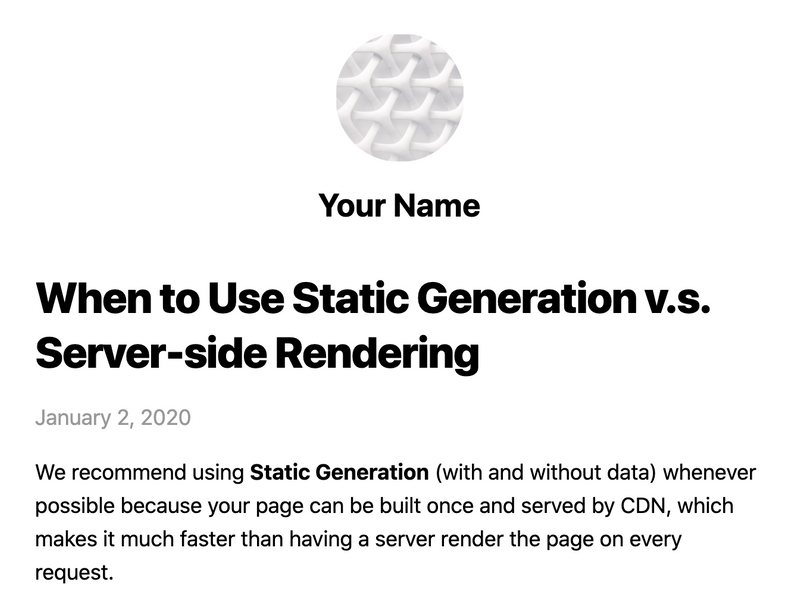
마지막으로 pages/posts/[id].js에 CSS를 추가해보자.
// Add this line
import utilStyles from '../../styles/utils.module.css'

export default function Post({ postData }) {
  return (
    <Layout>
      <Head>
        <title>{postData.title}</title>
      </Head>
      <article>
        <h1 className={utilStyles.headingXl}>{postData.title}</h1>
        <div className={utilStyles.lightText}>
          <Date dateString={postData.date} />
        </div>
        <div dangerouslySetInnerHTML={{ __html: postData.contentHtml }} />
      </article>
    </Layout>
  )
Polishing the Index Page
https://nextjs.org/learn/basics/dynamic-routes/polishing-index-page
pages/index.js에 각 포스트에 링크(Link)를 넣어 업데이트 해보자.
import Link from "next/link"
import Date from "../components/date"
Home 컴포넌트의 li tag를 변경하자
<li className={utilStyles.listItem} key={id}>
  <Link href={`/posts/${id}`}>
    <a>{title}</a>
  </Link>
  <br />
  <small className={utilStyles.lightText}>
    <Date dateString={date} />
  </small>
</li>
Dynamic Routes Details
https://nextjs.org/learn/basics/dynamic-routes/dynamic-routes-details
Fetch External API or Query Database
getStaticProps와 getStaticPaths로 어떤 데이터 소스로부터 데이터를 fetch 할 수 있다. getAllPostIds는 external API endpoint에서 가져올 수 있다.
export async function getAllPostIds() {
  // Instead of the file system,
  // fetch post data from an external API endpoint
  const res = await fetch("..")
  const posts = await res.json()
  return posts.map((post) => {
    return {
      params: {
        id: post.id,
      },
    }
  })
}
Development v.s. Production
- In development(
yarn dev),getStaticPaths는 every request 실행 - In production,
getStaticPaths는 build time에 실행
Fallback
getStaticPaths에서 fallback: false는 404 page의 결과를 반환, fallback is true라면 getStaticProps의 동작이 변경된다.
getStaticPaths에서 반환된 경로는 반드시 빌드시에 HTML로 렌더링- 빌드시 생성되지 않은 경로는 404 page가 되지 않는다. 대신 Next.js는 이러한 경로에 대한 첫 번째 요청에서 페이지의
fallback버전을 제공 - background에서 next.js는 요청된 경로를 정적으로 생성한다. 동일한 경로에 대한 후속 요청은 빌드시 사전렌더링 된 다른 페이지와 마찬가지로 생서된 페이지를 제공
Catch-all Routes (사실 언제 써야할지 모르겠음)
Dynamic routes는 3개의 dots(...)을 추가해서 모든 경로를 포착하도록 확장이 가능하다.
pages/posts/[...id].js는/posts/a,/posts/a/b/… 등에 매칭
getStaticPaths에서 id key의 값을 배열이 형태로 사용하면 된다.
return [
  {
    params: {
      // Statically Generates /posts/a/b/c
      id: ["a", "b", "c"],
    },
  },
  //...
]
그리고 getStaticProps에서 params.id는 array로
export async function getStaticProps({ params }) {
  // params.id will be like ['a', 'b', 'c']
}Router
next/router로 부터 useRouter를 importing 할수 있다.
404 Pages
404 page를 커스텀하게 생성하고 싶으면 pages/404.js를 만들면 된다. 이 파일은 build time에 정적으로 생성된다.
More Examples
- https://github.com/vercel/next.js/tree/canary/examples/blog-starter
- https://github.com/vercel/next.js/tree/canary/examples/cms-wordpress
- https://github.com/vercel/next.js/tree/canary/examples/cms-datocms
- https://github.com/vercel/next.js/tree/canary/examples/cms-takeshape
- https://github.com/vercel/next.js/tree/canary/examples/cms-sanity